by Eric Easton, CenterPoint Energy, USA
With a motorcycle riding father as well as a car and motorbike building big brother, it was almost a certainty I’d continue the tradition of creating rolling art. Lessons learned while designing, building and rebuilding cars has taught me a number of skills transferable to my personal and professional life. Furthermore, the friendships and memories gained over decades could never be replaced or erased.
Long before I knew electrical engineering would be in my future, I was learning the basics of pulse width modulation to reprogram signals to electronic fuel injectors. Of course, this was necessary because I had installed a turbocharger on an engine that was never intended to have one. More air means more fuel and these requirements were fulfilled by manipulating signals to the fuel injectors.
These first experiences with modifying cars made my choice of an engineering major all the more difficult. Consistent wrench turning along with wiring aftermarket electronics and reprogramming fuel maps resulted in me considering both mechanical and electrical engineering.
In the end, electrical engineering won out; however, mechanical courses such as Computer Aided Drafting and Design (CADD) found their way into my curriculum in the form of electives. These mechanical engineering electives would prove useful later when I attempted my most ambitious project ever, building a restomod racer from a 1965 mustang.
The Begining: A restomod is a classic car rebuilt with upgraded components which provide modern day performance. The build requires addressing all major systems including chassis, suspension, engine, transmission, brakes, wheels and tires.
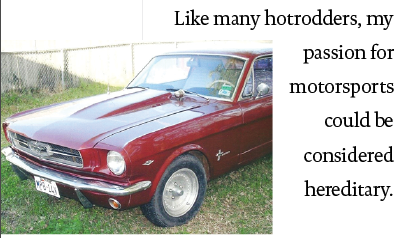
The 12-year project began shortly after I completed my undergraduate degree when I found a fairly solid 1965 mustang in a sales paper. My dad and I set out on a 4-hour drive across Texas to look at what would become my project car. (Figure A).
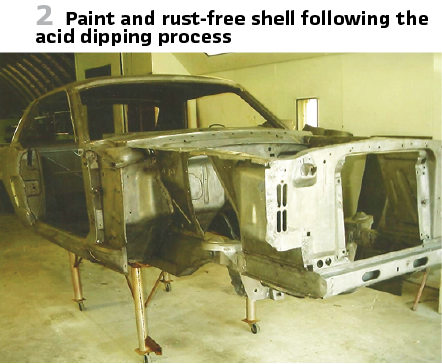
Once purchased, dad, brother and I started disassembling the car little by little until it was ready to be acid dipped to begin the rebuilding process. The entire car was lowered in a vat of acid to remove all paint and rust leaving a bare metal shell. (see Figure 2).
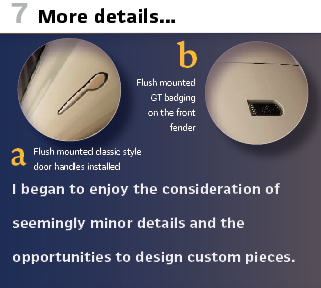
Fortunately, a shop was available just miles from my parents’ home to begin the rebuilding process. Progress was slow with only one system typically being addressed on an annual basis. One year the chassis, brakes the next until a dozen years later I had a car again. While the progress was slow, the process allowed me to practice one skill I now use on a regular basis. Learning to leverage the additional time resulting from delays can improve the end result of any project. The fact is progress does not always happen as fast as we would like; however, it can be beneficial when things are moving a little slower. One of the key aspects of a restomod is the near unchanged appearance of the body lines. This doesn’t mean there cannot be customizations, but they are typically more subtle. The artful additions to my 65 mustang could almost be overlooked and that’s what makes them special in my opinion. They take the form of bumpers, badges, door handles, and taillights. All these items were minimally modified to provide a more streamlined appearance, proving that small details can matter. (Figure 7a/b).
Through the process, I really began to enjoy the consideration of seemingly minor details and the opportunities to design custom pieces. The taillights are a perfect example of this process. After searching tirelessly for aftermarket billet aluminum taillights nothing on the market matched the vision in my head. Fortunately, I had retained some of my college CADD skills. After designing a custom set of light bezels, I was able to find a local company willing to cut them from billet aluminum per my design. (Figure 4).
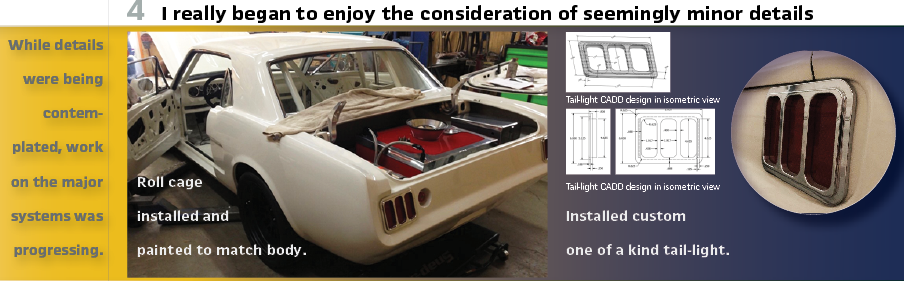
While aesthetic details were being carefully contemplated, work on the major systems was progressing. Because the planned drivetrain was expected to exceed the original horsepower by a factor of four, a purpose-built chassis was deemed necessary. This included an 8-point roll cage and sub-frame connectors to provide a high level of rigidity to limit chassis twist from the 800hp powerplant. (see Figure 4).
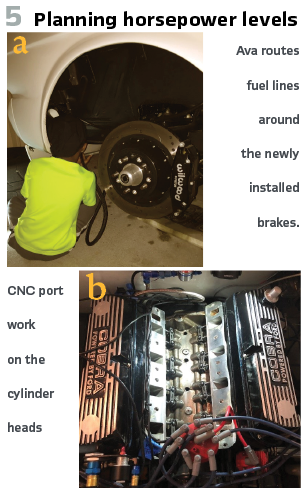
Considering the planned horsepower levels, stopping power needed to be at a premium. Large rotors and multi-piston calibers are a staple on racecars and this restomod requires comparable hardware. While the original brakes were a combination of disc and drums, the upgraded system has discs on every corner. The rotors measure 13 inches up front and 12 inches in the rear with 6 and 4 piston calibers respectively. Brake fluid passes through stainless steel lines from the master cylinder to the calipers to ensure a responsive pedal feel. (see Figure 5a).
In order to achieve the desired horsepower levels, careful planning and assembly was required. While the original V8 measured 289 cubic inches, the replacement engine has 376 cubic inches. Working with a skilled engine builder, we reviewed my list of selected components and calculated the expected horsepower and torque numbers. The combination of components was focused on achieving the highest level of efficiency in moving air in and out of the engine. The central components for efficiency are the cylinder heads and camshaft. The flow characteristics of cylinder heads are quantified using units of cubic feet per minute (cfm) and can be a good predictor of the engine’s horsepower capability. (see Figure 5b).
Intake and exhaust pathways are ported and polished to improve the volume and velocity of airflow. The camshaft is the conductor of the orchestra, opening and closing intake and exhaust valves to optimize cylinder combustion. The intended driving style must be considered when selecting these components as street drivability can suffer based on design.
I attempted to achieve balance between power output and drivability in the selection process. Just as details were important aesthetically, significant effort was placed on the smallest features including hand grinding engine block surfaces to aid oil control. For a high-performance engine, the smallest details can mean the difference between an engine surviving or failing under high rpm. The result of these efforts was 551 horsepower at the flywheel.
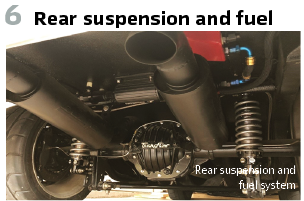
Nearly three times the original horsepower was not enough; therefore, nitrous oxide was enlisted to provide additional gains at the push of a button. Nitrous Oxide increases the power output of the engine by introducing additional oxygen and fuel to the combustion process. The installed system adds 250 horsepower and requires the use of 110 octane racing fuel for safe operation. This fuel comes by way of PTFE fuel lines fed by a 397 liter per hour fuel pump. (see Figure 6).
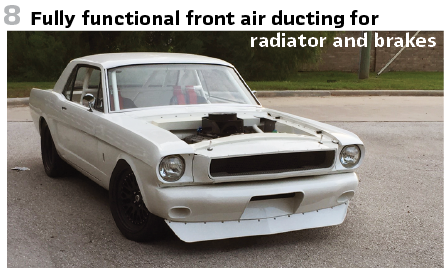
An upgraded water coolant system and custom shroud ensures engine temperatures remain controlled during street cruises. The shroud was designed to force maximum air flow through the radiator and has proven so effective the fan is not often activated. (see Figure 8).
It was not uncommon to take the car out hoodless during tuning sessions. Adjustments of the carburetor requiring checking of spark plugs could be accomplished easier and faster with the hood out of the way. Carburetor changes are now a thing of the past given the latest completed project. Last month the carburetor was set aside in favor of an electronic fuel injection system. Similar to the electromechanical to microprocessor relay change-outs I worked on in substations, the electronic fuel injection offers many advantages. The computer-controlled delivery of fuel can use closed-loop feedback to provide consistent performance even as ambient conditions change. Externally, the two fuel delivery systems look very similar. (see Figure 9).
Internally, the fuel injection body houses eight fuel injectors where the fuel bowls would normally be located. The fuel injection system has the ability to support up to 1250 horsepower should a supercharger or turbocharger be added in the future. Both the supercharger and turbocharger increase horsepower by forcing more air into the engine. For the time being, temperature changes are the biggest challenge and can often lead to a need for carburation tuning changes.
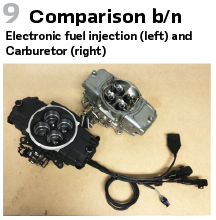
Fuel injection can better compensate for changes without the need to raise the hood. Additionally, modifying parameters such as ignition timing can be completed from a hand-held controller sitting in the driver’s seat.
Once installed, the EFI system completed the last step in modernizing the mustang. A weekend cruise often resulted in gasoline fragranced clothing and a lingering odor in the garage. The fumes are greatly reduced due to increased precision in fuel delivery from the fuel injection. The start of a drive used to require a process to prime the carb and cycle the gas pedal until a successful start. Now a push of a button fires the car without the need for any extra effort. The unit was a direct replacement for the carburetor and only required minor changes to the throttle linkage and fuel lines. Additional changes were related to power and control wiring to accommodate the minimal set of sensors including water temperature, throttle position, fuel pump control as well as rpm.
A known issue with installation is electromagnetic interference, another topic I often work on in my professional life. Special care was taken to route cables away from electrical noise sources and ensure orientations which minimize parallel runs of cable. Thus far, the system has performed excellent making the car much more fun to drive and simplified maintenance. The EFI modification will make it much easier to attend meetups and share experiences with others.
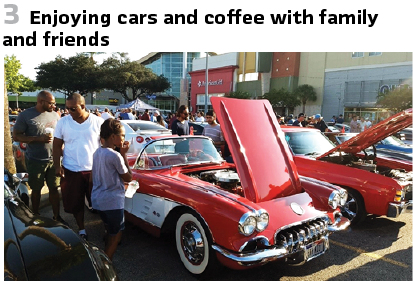
Hotrod culture thrives on bringing enthusiasts together to share ideas and lessons learned. Whether it’s a helping hand or a specialized wrench, friendships forged over a car build can last a lifetime. A number of groups hold events on a regular basis and give opportunities to see cars you have only read about. (see Figure 3).
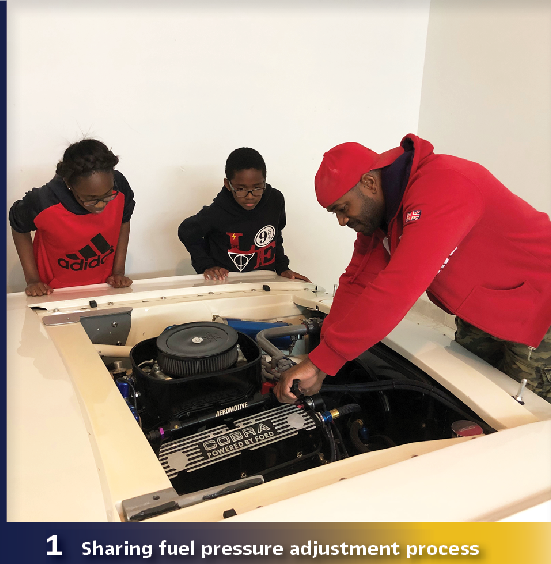
It also offers an opportunity to share experiences with other generations. In my efforts to expose the next generation to motorsports, I have worked to share my experiences with my kids. Inviting them to participate in routine maintenance and performance upgrades. (see Figure 1).
These projects can help share skills which assist with a number of life situations. Problem solving, patience and perseverance are all part of car building. It is one thing to work on cars but another to drive them.
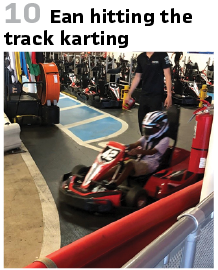
Until my kids can reach the pedals, they will have to make do with another type of machine. (see Figure 10).
When working with the kids, I enjoy asking questions and seeing the responses I receive. It is also a chance to discuss safe working practices and the importance of avoiding short cuts when completing a project.
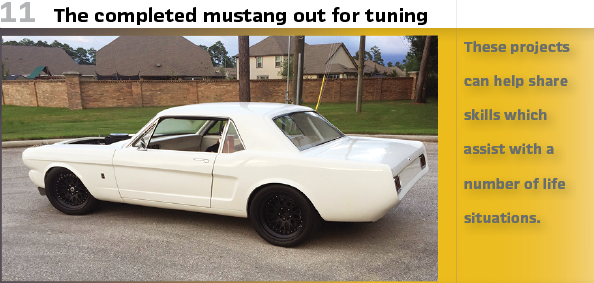
Car building has been and continues to be a passion of mine for its ability to provide self-expression and connection with those around me. Many of the successes I have had in my professional life are directly related to lessons learned from car projects. Likewise, my most enduring friendships have been from those who shared a common passion…in this case hot rods! (see Figure 11).
Biography:
Eric Easton has performed various roles in T&D System design and operations. He is presently Director of the CenterPoint Energy Real-Time Operations organization responsible for Transmission System Operations. During his career Eric has led several design and process innovation initiatives including 3D substation design, relay panel redesign, IEC 61850, Asset Life Cycle Analytics, QA/QC program development, and EMP Mitigation. He received a PhD in Systems and Engineering Management from Texas Tech University, MBA from the University of Nebraska at Omaha and BS degree in Electrical Engineering from Prairie View A&M University. Eric is a registered Professional Engineer in the state of Texas.